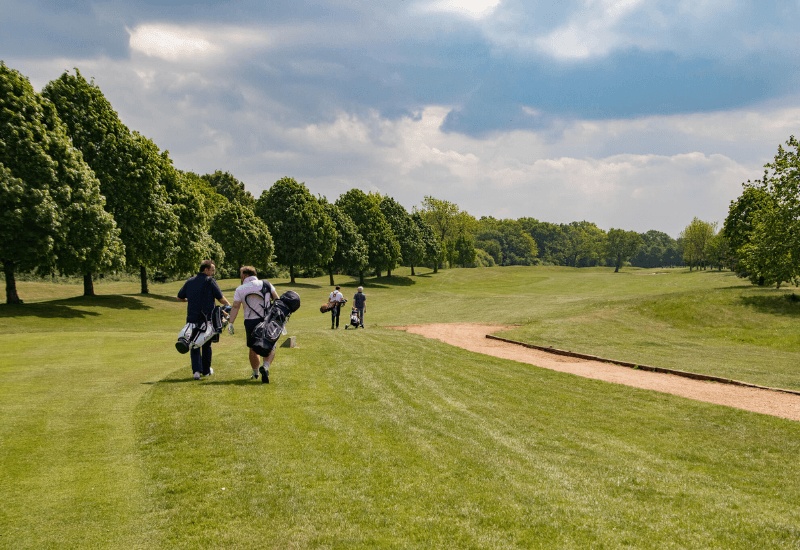
Hole 1
Yardage - White Tees 548; Blue 519; Red 494
Par 5, Stroke Index 11
The opening hole is a long par 5 designed to allow play to flow freely. Care must be taken with the first and second shots to avoid the large trees which protrude into the left hand side of the fairway. Two fairway bunkers guard the right hand side of the fairway. A generous sized green and fairly level putting surface should ensure a satisfactory start to the round.
Hole 2
Yardage - White Tees 341; Blue 316; Red 288
Par 4, Stroke Index 5
A deceptive hole which is sure to play longer than the yardage indicates. The tee shot is played over the lake which also guards the 14th green. An oak tree protects the left hand side of the fairway and a fairway bunker right. A good drive will leave a short iron to a wide but very shallow green. A right hand pin position may tempt errant golfers into one of the greenside bunkers, and middle of the green is always a good shot on this hole.
Hole 3
Yardage - White Tees 175; Blue 166; Red 155
Par 3, Stroke Index 15
This par 3 plays slightly uphill and the two deep bunkers and out of bounds to the left of the green ensures only an accurate shot will find this two tiered green.
Hole 4
Yardage - White Tees 363; Blue 318; Red 278
Par 4, Stroke Index 7
Off the back tees a drive of over 200 yards will be required to reach the angle of the dog-leg. The brave golfer can drive over the left hand trees resulting in an easier approach shot to a large, elevated green. A bunker guards the left hand side of the green, but the very demanding tee shot is key to this hole!
Hole 5
Yardage - White Tees 125; Blue 114; Red 105
Par 3, Stroke Index 17
From the highest point on the course a short iron will be needed to find the shallow green, with out of bounds behind the green and bunkers short. A par or birdie opportunity awaits.
Hole 6
Yardage - White Tees 375; Blue 320; Red 309
Par 4, Stroke Index 9
The ability to fade a ball and take advantage of this downhill tee shot will leave a short iron to the green. However, the left hand side of the fairway opens up this well guarded green, provided you avoid the two left hand fairway bunkers. Large trees protect the right hand side of the green, and the green slopes from front to back.
Hole 7
Yardage - White Tees 558; Blue 540; Red 477
Par 5, Stroke Index 1
The longest hole on the course demands very accurate play through a tree lined fairway to a green protected by fir trees. Out of bounds extends for the majority of the left hand side of this hole and the approach to the well protected green demands a precise shot. Club selection is vital as this green is the longest on the course, but also very narrow.
Hole 8
Yardage - White Tees 385; Blue 374; Red 351
Par 4, Stroke Index 13
The brave line over the top of the pine trees will open up this viciously sloping green. The green falls steeply from front to back, with a steep slope to the left and a bunker right, meaning only a well struck approach will remain on the putting surface.
Hole 9
Yardage - White Tees 431; Blue 373; Red 359
Par 4, Stroke Index 3
The clubs signature hole is a stunning par 4. It requires a long straight drive followed by an accurate approach. Both shots need to avoid the two expanses of water lurking on the right hand side. Get a four or better and reward yourself with a well-deserved stop at the halfway house.
Hole 10
Yardage - White Tees 540; Blue 520; Red 455
Par 5, Stroke Index 10
The new elevated tee ensures a tough start to the back 9 holes. The lake on the right of the hole will catch any errant tee shot, and a blind approach is played to a difficult contoured green. The approach shot is downhill and two well struck shots will open up a great birdie opportunity.
Hole 11
Yardage - White Tees 235; Blue 213; Red 198
Par 3, Stroke Index 4
From a elevated tee a long iron / hybrid or most likely a wood will be needed to find a relatively small sloping green nestled between trees and a mature hedgerow. The green slopes steeply from right to left, and an uphill putt is strongly recommended to achieve par.
Hole 12
Yardage - White Tees 288; Blue 267; Red 266
Par 4, Stroke Index 18
The easiest hole on the course can be overpowered by the longest of hitters. However, for the majority of golfers accuracy and not length is the key to this attractive hole.
Hole 13
Yardage - White Tees 187; Blue 175; Red 143
Par 3, Stroke Index 14
From a tee set back in the trees this hole plays slightly downhill to a two tiered green which is protected by water to the right and a bunker left. This is a demanding par 3 and can be affected by crosswinds.
Hole 14
Yardage - White Tees 395; Blue 365; Red 345
Par 4, Stroke Index 6
The difficulty of this hole greatly outweighs its length. The hole has two lakes, an encroaching fairway bunker to the left and a green which is set in the upslope of the lake and is like an upturned saucer. The long hitters may need to lay up short of the second lake, which cuts into the fairway. The approach shot demands precision, but there is a safe route around the edge of the lake but it will almost certainly mean dropping a shot.
Hole 15
Yardage - White Tees 448; Blue 416; Red 397
Par 4, Stroke Index 2
This is a long and demanding par 4. with the green raised and sloping from back to front. For the majority of golfers a five will be a satisfactory score.
Hole 16
Yardage - White Tees 163; Blue 144; Red 137
Par 3, Stroke Index 16
The last of the par 3 holes is a real stunner. With water surrounding the back and front left of the green, only the very brave will attack the flag when the hole is cut towards the rear of the green.
Hole 17
Yardage - White Tees 355; Blue 326; Red 307
Par 4, Stroke Index 8
An accurate well struck drive between a grass bank and two bunkers will only leave a short approach shot. Trees encroach the drive from the edge of the lake on the right, and the tree to the left of the fairway can impede the approach shot. The green is well protected by a deep greenside bunker.
Hole 18
Yardage - White Tees 521; Blue 483; Red 473
Par 5, Stroke Index 12
The last hole is a par 5 which sweeps gently to the right. However, there is a lake to the right to catch any errant drive and many strategically placed bunkers. Once these hazards are negotiated the fairway slopes down to a generous sized putting surface. An inviting final hole, which will yield many birdies and the hole offers a great setting in front of the clubhouse and 19th hole.


